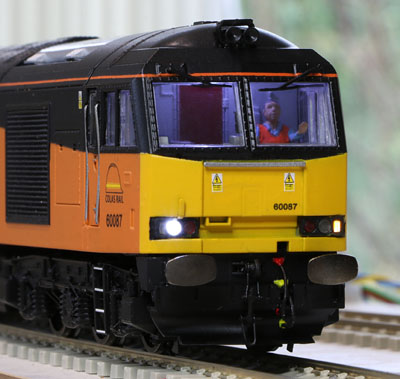
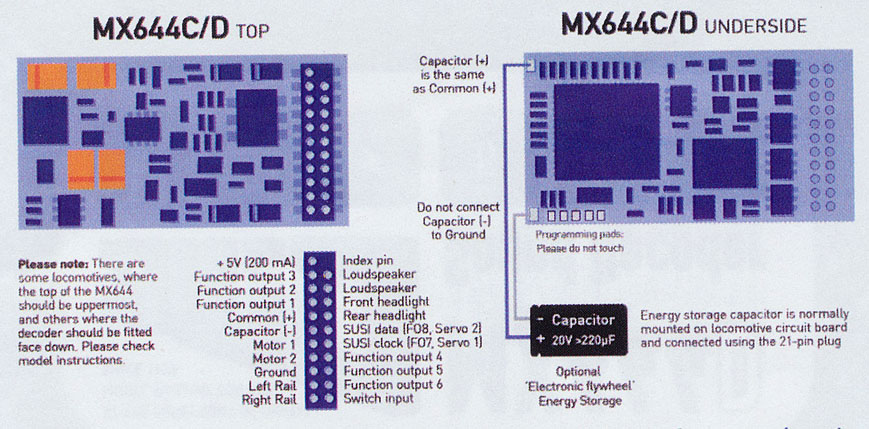
| Colas Class 60 update with comprehensive lighting options and Paul Chetter Zimo sound system, using the plug-in MX644D decoder. |
|
|
Introduction: I really like the Colas livery on Class 60 locos, so treated myself to a resprayed unit from Olivia's Trains in Sheffield as an early Christmas present :-) . Paul's Class 60 Protodrive sound project may well be refined during the life of the loco, so I've decided to fit a plugable 21 pin MX644D, via an ESU 21 pin adapter PCB, to simplify any future sound project upgrades. As a Hornby DCC ready loco, the lighting assemblies use a common negative supply, so the usual array of PNP transistor invertors are fitted on the rear of the cab bulkheads at each end. The hardware circuit is identical to the earlier MX645 equipped loco, except that as FO7 is a low current logic output on the 21 pin MX644D, I need to add an N-channel MOSFET buffer to make this output behave as a normal FO. The lighting is a similar comprehensive fit to that developed on the previous Zimo equipped DB Schenker Class 60. This time I have completely removed the original Hornby main PCB assembly, to ensure adequate head height for the plug-in decoder and to accommodate 4000uF of stay alive capacitors. |

The circuit diagram of the lighting system. The PNP transistors are BC559C types and the diodes are 1N4148. The MOSFET is an SMD 2N7002.
The diodes are arranged so that activating either FO6 or FO7 prevents the voltage available to the headlight LEDs exceeding circa 1.2 V. (Which
is not sufficient to illuminate them.) FO6 provides a continuous output when on, and is used to hold the headlights off during yard mode.
When FO7 is activated, the output is modified by a Zimo facility that disables its action when the loco is moving. This is used to automatically
disable the headlights when the loco is stationary.
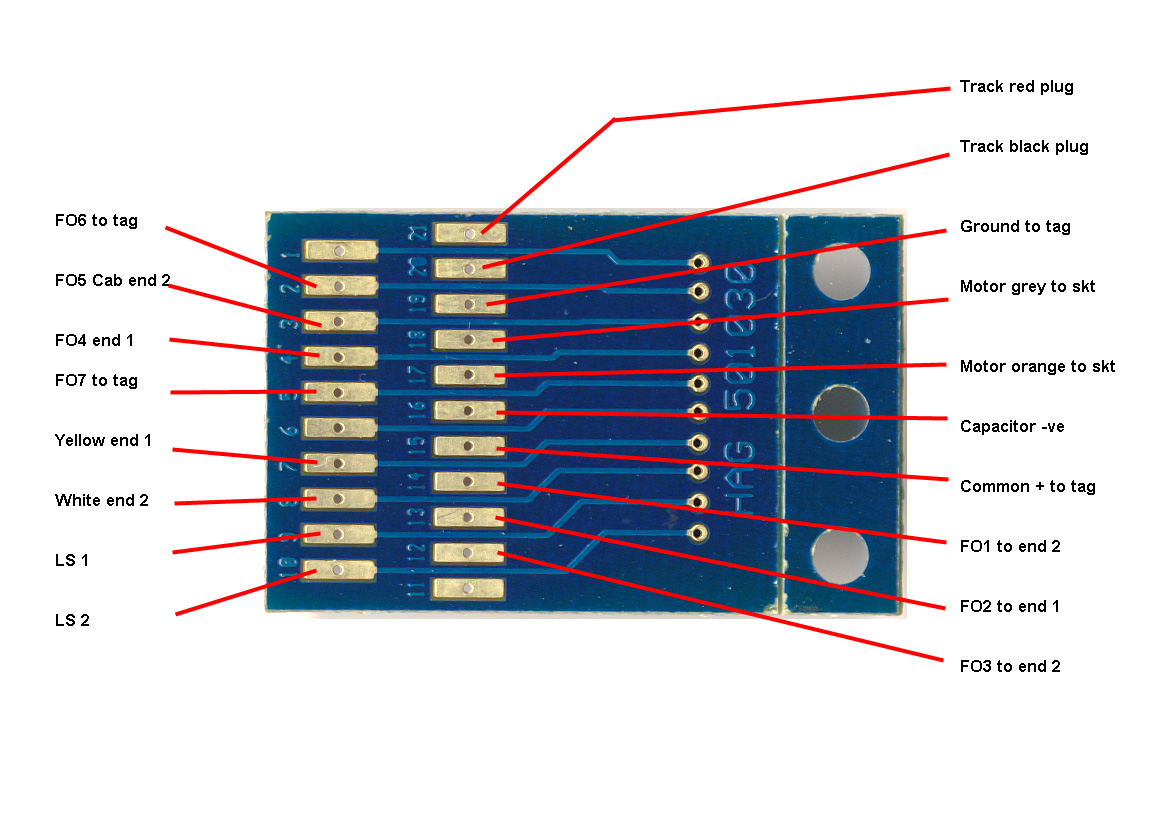
| Wiring up the ESU
21 pin adapter PCB (Type 51967):
The wiring needs a bit of planning.
All connections are soldered to the underside pads |
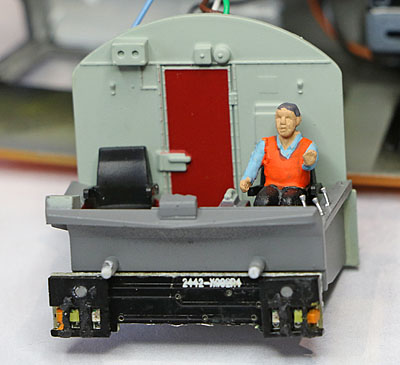 Driver added in No.2 end cab. Note outer marker LEDs painted with water colour yellow. |
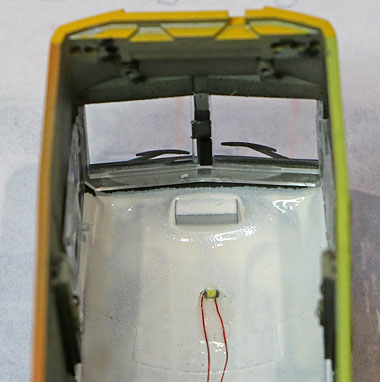 White painted cab roof with white LED Cab light fitted. |
| The internal
arrangements:
Removing the main PCB assembly from the chassis block, makes the motor flywheels and some of the drive shaft parts vulnerable to contact with the wiring. Thin plasticard sheets are therefore fitted to provide additional protection.
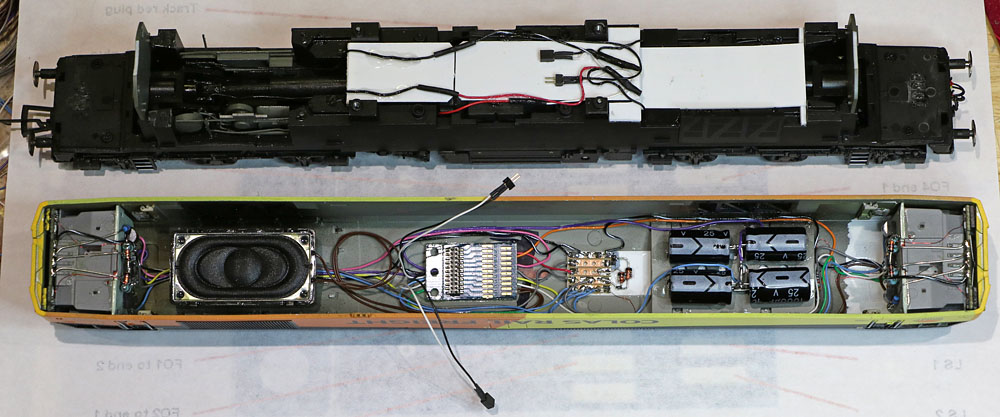
Overall view of the upper body shell and chassis assemblies.
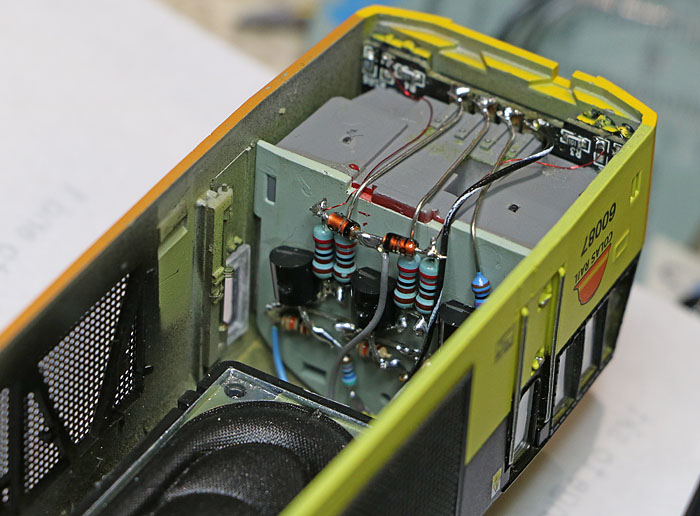
Showing the three PNP transistor stages on the rear of the number one end cab. Also, part of the 40mm x 20mm ESU 50334 speaker.
The 21 pin adapter PCB and supporting tag strip assembly, both bonded in place using Glue 'n Glaze.
Four 1000uF 25 Volt capacitors connected in parallel to provide 4000uF of stay alive capacitance.
Motor connector (male) and wheel contacts connector (female) on the chassis assembly. |
|
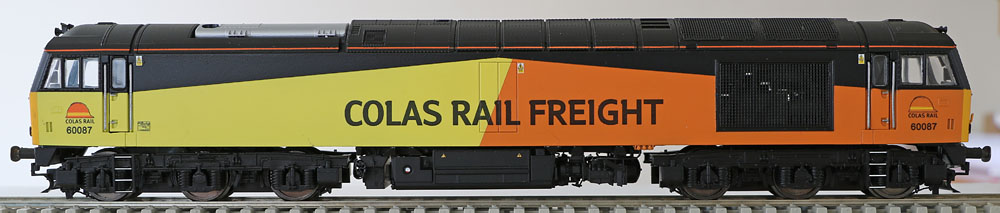
A few cosmetic problems: The most obvious issue is the slight error in the Colas livery: The black roof colouring should intercept the top of the diagonal join between the orange and yellow areas at its apex (which should be slightly closer to the orange end to coincide with the orange and yellow join line). I can't realistically remedy this issue so I will have to live with it unfortunately.
Next problem might be solvable: 60087 is in fact a named locomotive "CLIC Sargent" and I'm exploring the availability of etched name plates. Order now in place with Fox. More minor is some over-painting of the black lighting modules with warning panel yellow, now tidied up..... and a rogue rear light lens which, unlike its 3 counterparts has no red shading and fell out when being examined. I've glued this back in place and applied a thin coat of red water colour paint. Finally, the original Hornby marker lights are pure white LEDs. The LEDs have been painted with a thick coat of yellow water colour paint to reduce intensity and provide a more realistic colour. |

Nameplates now in place
| CV Programming:
(Identical to the DB Schenker
Zimo equipped 60)
Summarising the lighting requirement:
Conventional Mapping: NB: requires F8 to be available.....if its not, use any other available key up to and including F 12 and amend the FO5 key assignment quoted below.
Swiss mapping:
Other essentials: CV131=60 to automatically switch off the cab light (FO5) when the loco moves. CV159=60 to make FO7 off when stationary and on when moving. CV124=128 to switch FO7 to logic function output Remove fader key from F19: Set CV313 to zero. Add volume down to key F27: Set CV396=27 Add volume up to key F28: Set CV397=28 Re-shuffle a couple of sounds using the sound mapping CVs Move power ramp-up key to F7: Set CV339=7 Tweak brake air release volume at start: Set CV582=120
Note: If all operations are required to automatically shut down the headlights when stationary, simply leave key 19 pressed
Complete Function Mapping:
All working fine! |

| Protodrive Variations:
A big plus point for Paul Chetter's "Protodrive" sound projects is that the driving arrangements can be as simple or as advanced as the user wishes to make them. The previous protodrive Class 60 is programmed for full notch control, which enables the user to adjust the power settings of the diesel sounds quite independently of the locomotive speed. This is particularly useful when pulling maximum load trains, as the engine can be run up to full power before the heavy train starts to move. However, it does require additional work on the part of the driver (or the PC schedules) to maintain the engine power at an appropriate setting as the train progresses around a layout. I'm currently trying a more automated arrangement on the Colas 60, which allows me to select full power for the initial start, but can be returned to speed related power at the touch of a button. (With the usual Zimo sound power modification facilities active) including of course the coast button, to force the engine into idle at appropriate times. A light engine key is also provided.... very useful, to enable acceleration and deceleration delays set via CV3 and CV4 to be reduced proportionally at the touch of a key, when operating with no train on the hook, although, as I like the feel of plenty of momentum, even in a light engine, I've made the change somewhat less than Paul's original setting. I'm going to run with the semi-automated approach, which apart from the issue described immediately above, use Paul's original settings. These work well for me now thanks to Paul kindly shifting the speed thresholds between notch sounds up a little compared to the original. (This remains about the only characteristic in the Zimo settings that the user cannot adjust!) So thanks Paul! An excellent job! |
| Supplier website links or
contact email:
|