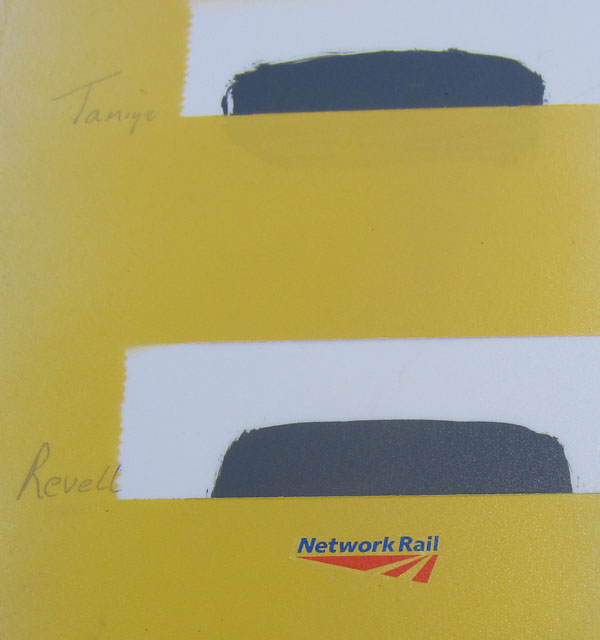
| The New
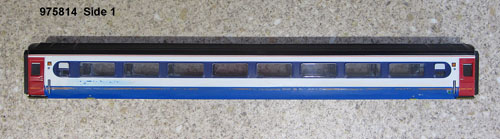
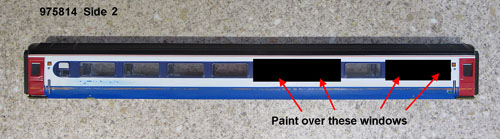
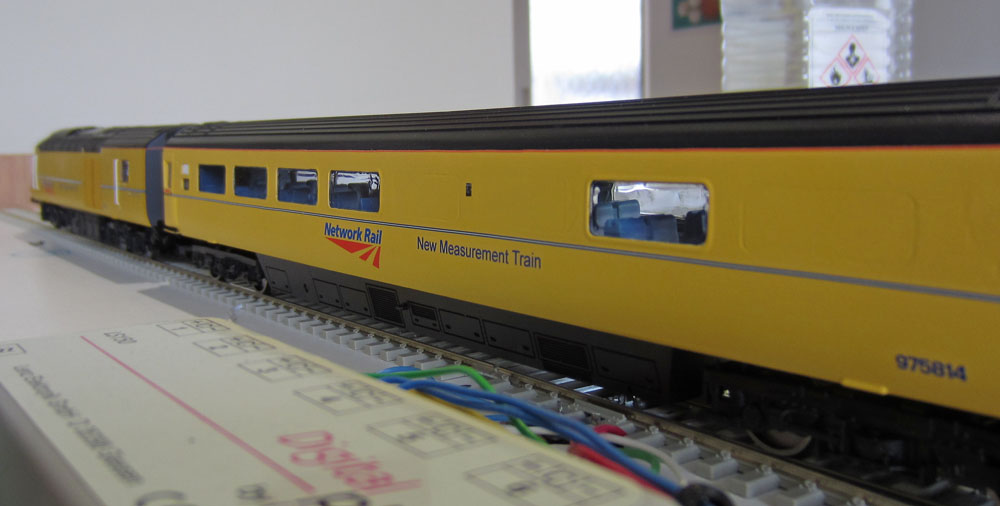
Measurement Train Coaches: The starting point: I've found a few good photograph collections covering the NMT coaches. Unfortunately the best of the bunch don't allow their pics to be copied, so I've had to make my own notes on photos of the Hornby Mk3 coaches obtained for conversion. I found photos of 6 mk3 coaches, although most complete NMT photos show 5 car train consists. Looking in more detail, the most difficult coach to reproduce using available Hornby units is number 975984, the Lecture Coach. So this unit will not be reproduced. The remaining MK3s are shown below, together with reduced size copies of the window configuration pics: 975814 Conference Coach: Standard open Mk3 with a few windows on one side painted over.
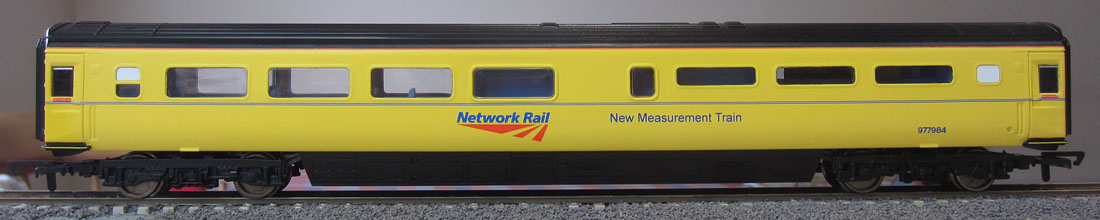
977984 Staff Coach: This is now the trickiest to accurately reproduce. A lot of cutting & pasting, using a donor TGS coach will be required to get it exactly right.
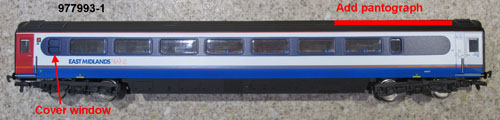
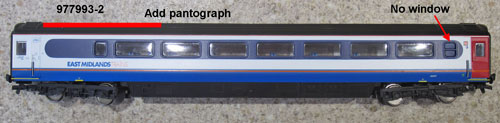
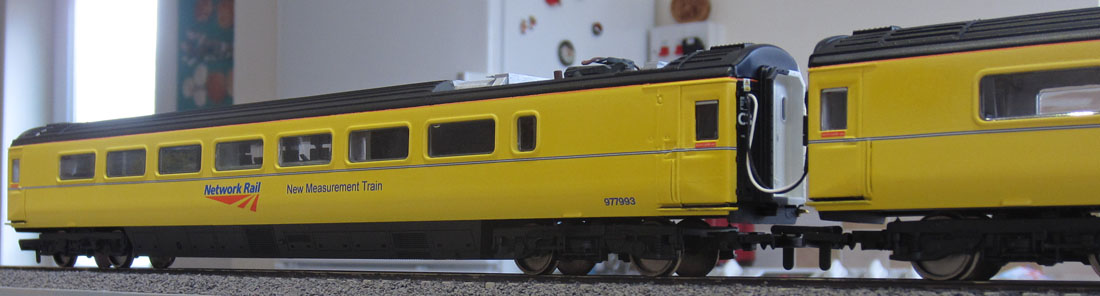
977993 Overhead Line pantograph equipped Coach: A standard TGS just needs some surgery at one end and a pantograph fitting.
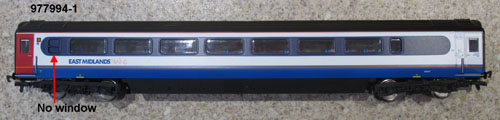
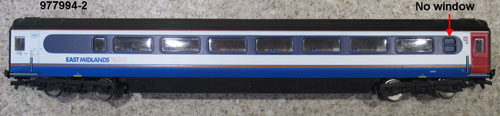
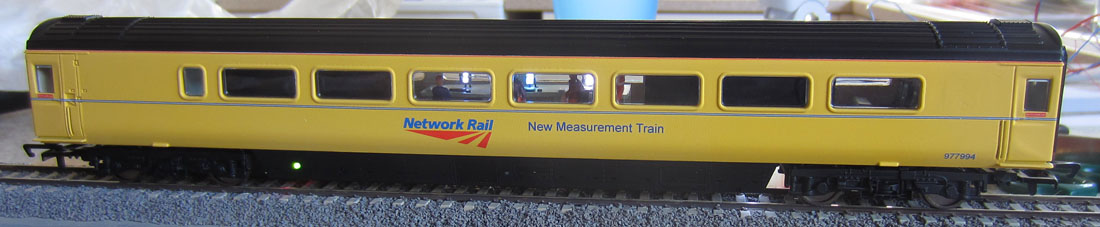
977994 Track Recording Coach: A standard TGS is needed.
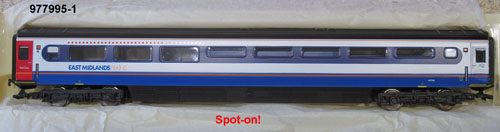
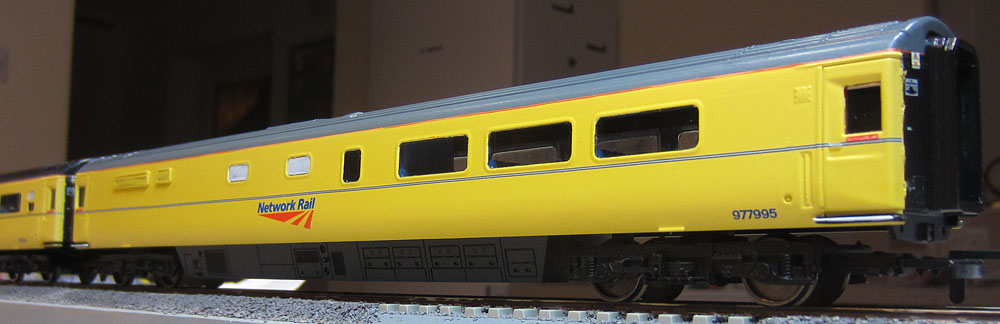
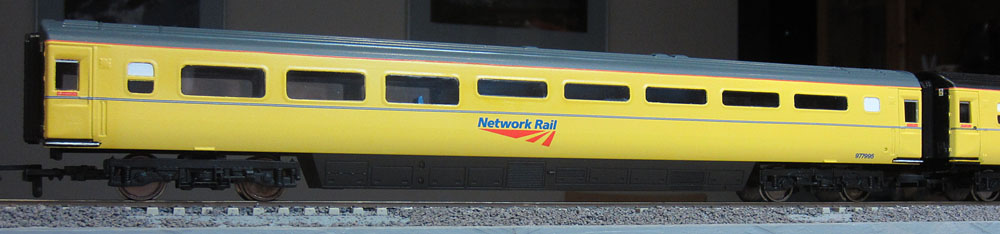
977995 Standby Generator Coach: An HST Buffet Car with some minor mods to the windows on one side..... NB, this coach has a grey roof!
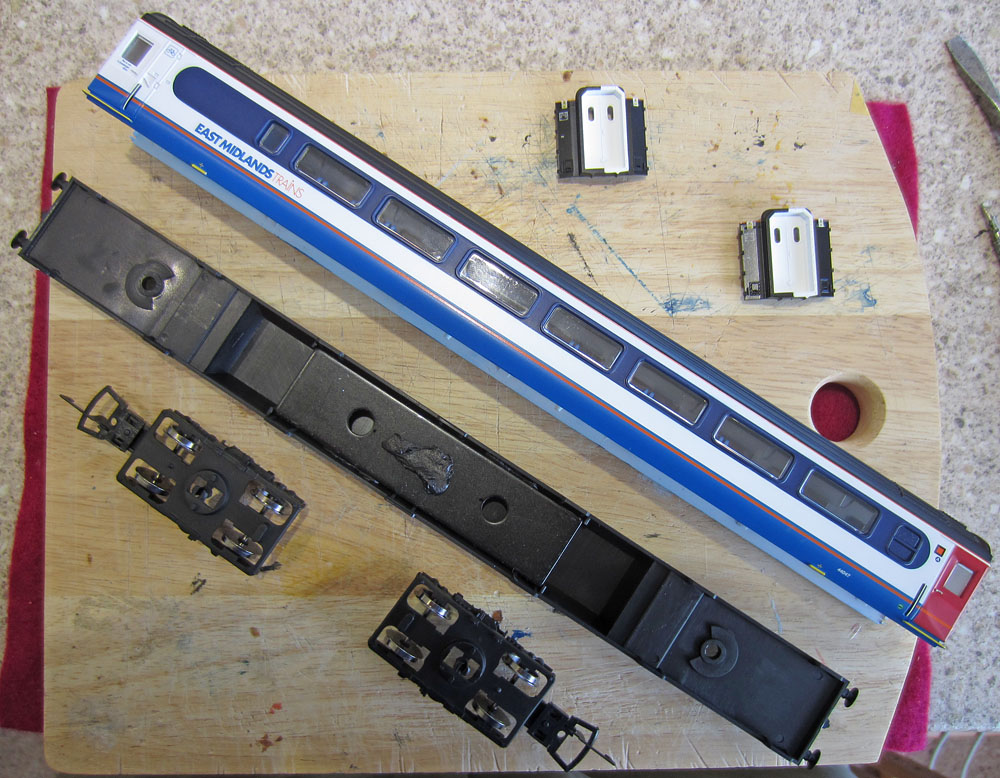
Preparation for the coaches with windows firmly glued in place by Hornby: The coach bodies are separated from the underframes. The window surrounds of any plated over windows are first cut and filed down flush with the bodywork and then filler is applied around the edge of the windows. The East Midlands paintwork is sanded down with fine abrasive paper, with particular attention to raised lettering and markings. The upper edge of the white sides and orange cant rail needs to be removed to get the roof line somewhat lower that EMT's original. The bodywork is cleaned to remove all sanding debris and surface grease. The ends of the coach, the roof and the open underside are masked. Where the windows cannot be removed for painting, the windows to be retained are masked with pre-cut pieces of Tamiya masking tape and small quantities of Maskol are added around the edge of the mask to cover any exposed glazing. NB: Maskol can only be left on for a maximum of 3 days, so the clock is ticking from this point on! Painting & Decals: Several coats of Humbrol matt white acrylic spray are applied to each side. Next, Humbrol gloss yellow (number 69) acrylic spray is applied in a number of coats to achieve the final colouring and a gloss base for the transfers. NB: See comments on spray painting technique below! The yellow gloss is is allowed to dry overnight. Water-slide transfers are applied over the gloss paint. Including the Network Rail & NMT Logos, the horizontal blue band, coach number and orange cant rail markings. When the transfers have dried, a coat of Humbrol matt varnish acrylic spray is applied. This is built up using initially, a very thin coating to avoid damaging the transfers. NB: Use acrylic spray matt grey for the standby generator car roof as the first stage of the painting process. (I made the mistake of using brushed enamel paint for this roof and as you will see below, had to follow with specific measures to prevent acrylic spray solvents reacting destructively with the enamel! Painting Technique: The spray can should be swept across the area being painted at a distance of around 20 to 30 cms and at a sweep speed fast enough to avoid flooding with paint but slow enough to achieve a useful coat. NB: You have only about 10 seconds to apply a single coat of spray paint. Then you must be patient and wait 15-20 minutes for the paint to dry, before adding a further coat. Initially, I wrongly assumed that the paint dried in around a minute to a point where the next coat could be applied but discovered that this produces a very poor rough ripple-like finish. So be warned, it takes longer to wait between coats, but the results are infinitely better! Finishing: After removing the masking tape & Maskol from the windows, some touching up is required on the window surrounds. A wooden cocktail stick can be used to gently remove excess paint from the edge of the windows and Humbrol Yellow matt enamel is used to colour any small areas of exposed window surrounds. Keep a spherical head on the wooden cocktail stick, if you sharpen it to a point, you risk scratching the window surface! |


|
The first
coach: I dropped a major clanger on the first window masking method I tried. I used electrical tape after a preliminary test suggested that it didn't damage the plastic window surface. However, after completing the painting & transfer application process over a period of a couple of days, I was horrified to discover that the surface of the windows had in fact been damaged. Fortunately a coat of gloss varnish restored things to a (just) acceptable standard.
Coach upper body shell masked and ready for spraying.
Having previously had bad experiences of the coverage capabilities of yellow paint, I applied an overall coat of matt white primer (acrylic spray paint). I then added a little filler to the deleted windows before a final coat of white.
Polar Express?
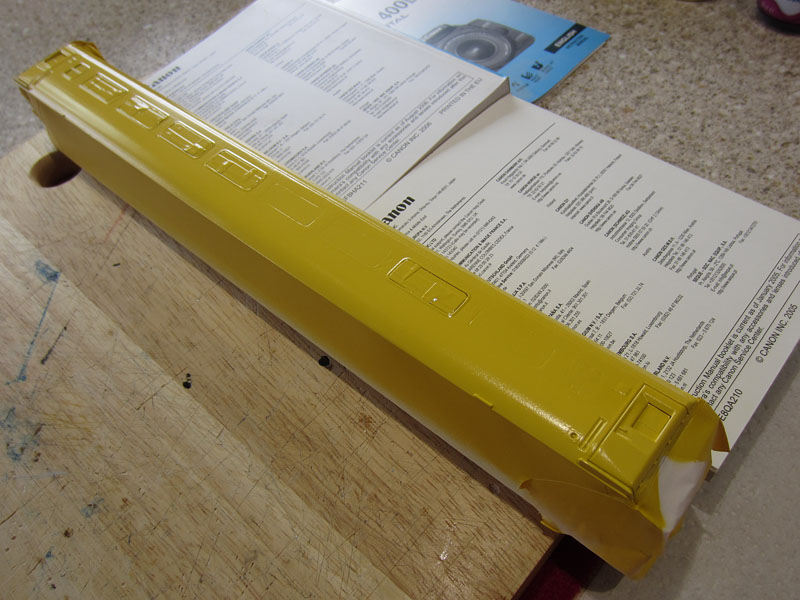
Next an overall coat of gloss yellow. The covering power over the white primer was quite impressive. I let this dry thoroughly over-night before adding some water slide transfers.
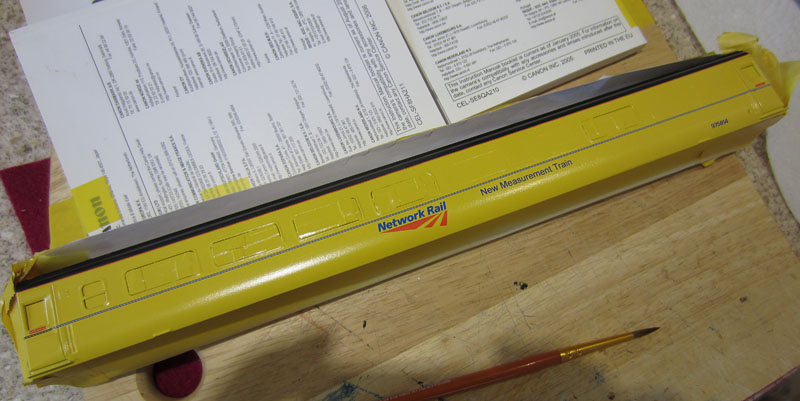
Taped down to some old camera manuals to keep things level and stable while the transfers go on.
The NMT transfers from Railtec went on without too much drama. The double blue band was not quite long enough and the extra bit added over the door, to complete the run, had no central white area between the lines. Not too obvious, so "it'll do" but I must check a small length of the subsequent strips before I do the next side! I carefully removed the roof masking, so that I could add some Fox's orange cant rail lines...... these proved very tricky, with a tendency for the transfer strip to become twisted when adjusted sideways into position. In the end, I had to use short strips, superimposed over the previous strip, to keep it under some sort of control. Despite my slightly speckled gloss finish, there was no significant silvering from the transfer backing sheets.
Most of the transfers in place including that dreaded cant rail.
Closer view showing the cant rail
Re-masked roof, ready for protective matt acrylic varnish.
First the good news ...... the matt varnish went on without any problems:
Good matt finish with no adverse reactions from the transfers.
Now the bad news ....... The electrical tape adhesive has reacted with the window surface, leaving hazy regions. Also, the paint has penetrated in a small way on some windows. Finally, on one window only, some crusty deposits have appeared at the junction of a corner piece of the electrical tape.
The windows are not in good shape when the electrical tape is removed.
A wooden "cocktail" stick is effective at cleaning up the edges of the windows without significant surface scratching, but beware, if you sharpen the end, this can result in surface marking.
Things look a lot better after cleaning up the windows and applying a coat of gloss varnish to the window surface. The doorsteps are also painted matt black.
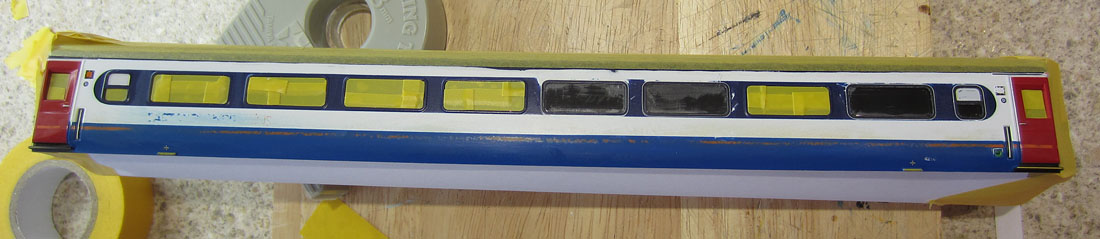
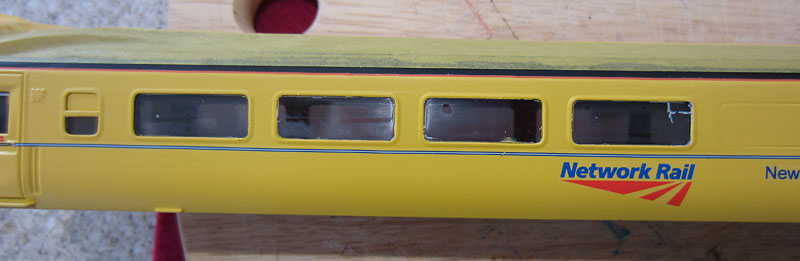
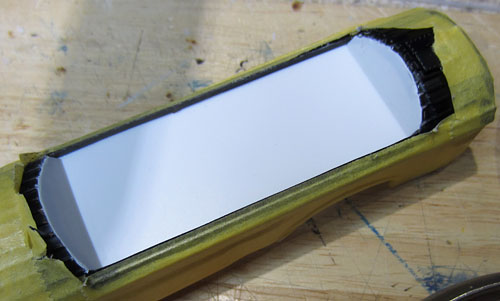
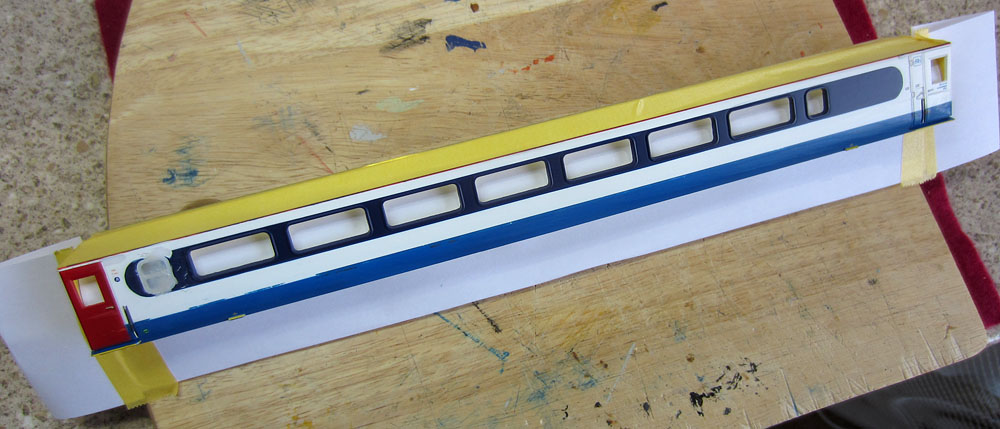
Side 2 of the first coach: All the windows are now covered by Tamiya masking tape. The large window covers were cut using a plasticard jig for the rectangular shape, with the rounded corners snipped by scissors. I've tried to make good the main fit shortfalls using small quantities of Maskol painted over the small areas of window not adequately covered. This technique works well, leaving the window surface intact!
Side two masked up and ready to paint.
Showing the Maskol additions around the edge of the Tamiya masking tape pads.
Painted and transfers in place........roof re-masked and after an over-night period for the transfers to fully dry out, we'll be ready for a coat of matt varnish.
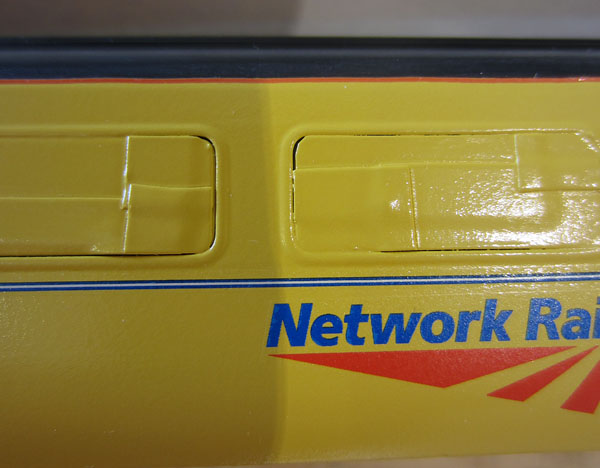
That's more like it! No window damage this time, just a bit of tidying up around the window edges required!
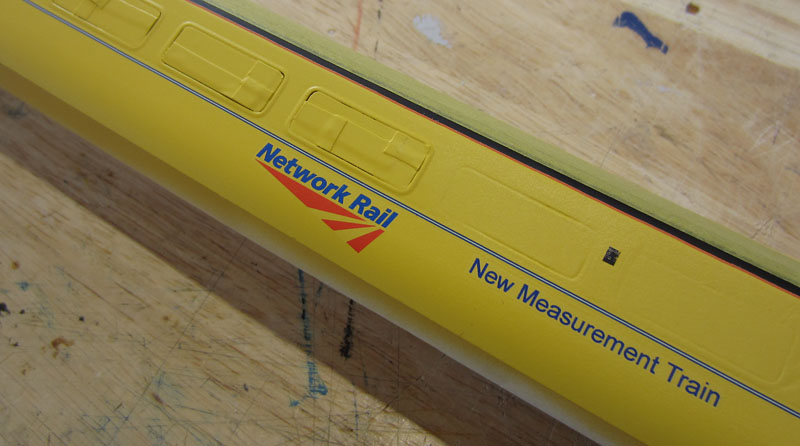
Second side of the conference car (now back on the chassis)
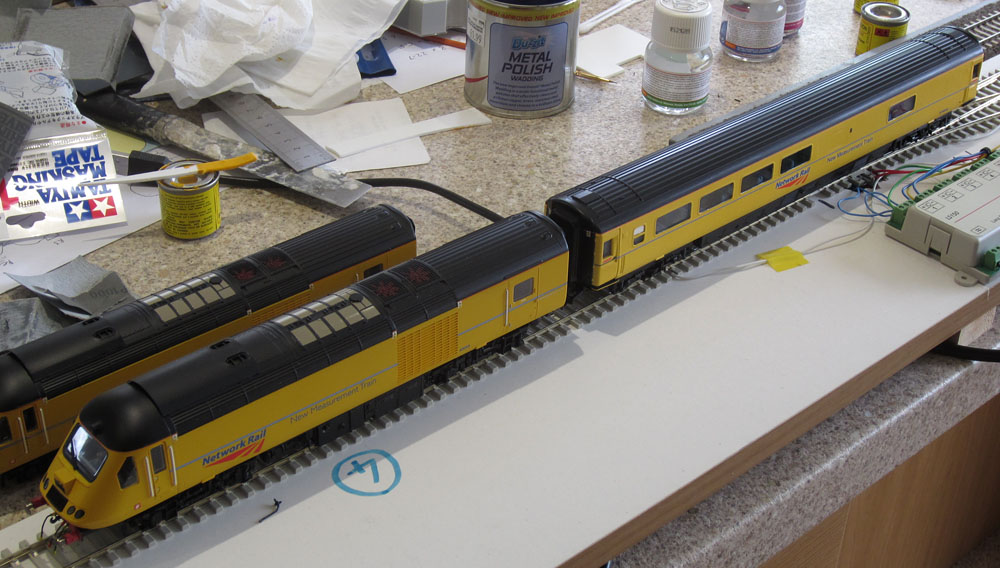
The new coach paired with an HST power car (side 1 visible)
HST power car plus new coach on the test track viewed from above.
One down, four more to go!!!!!! Specific issues for the other coaches are described below......... |


|
Standby Generator Car:
This is the only car with a grey roof for the modelling period
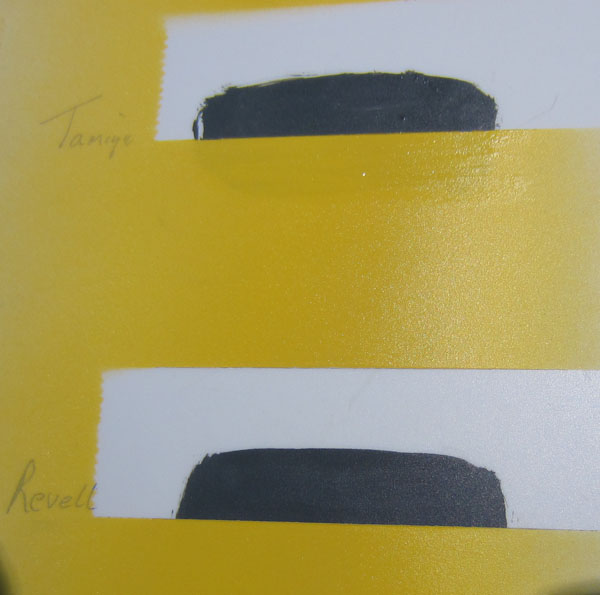
chosen. Bad choice of paint for the roof..... I brush painted Phoenix Network Rail roof grey enamel on to the roof........ subsequent tests on a piece of plasticard reveal that Humbrol acrylic matt white primer and matt varnish react spectacularly with this enamel paint..... I've abraded the excess grey away from below the masked roof line but I need to find a material to seal the enamel paint under the edge of the masking tape to protect it before applying acrylic white primer. First try: Humbrol matt enamel....... still a bad reaction...... Acrylic spray on top of enamel is clearly a bad idea! Next try: Tamiya & Revell brushed acrylic paints.... Tamiya is very watery & has poor coverage over the grey enamel. Revell is thicker & I've exactly simulated the masking tape edge scenario here. Both appear to have gone on without damaging the grey enamel. Overspraying with acrylic matt white, then acrylic gloss yellow leaves no damage. I've subsequently removed the masking tape (very carefully) and both test samples have a clean undamaged interface between grey & yellow.
Plasticard test areas using brushed acrylic paint to act as a barrier between enamel grey and sprayed acrylic white then gloss yellow.
Next I'll apply a test transfer on the yellow & when its dried, I'll overspray enamel matt varnish to see if this can be used to seal the cant rail without damaging either the yellow or the grey......
Good news! spray-on enamel matt varnish can be sprayed over the acrylic spray yellow and the enamel roof grey without any adverse reaction! (the test transfer applied on the yellow is also OK)
Summary of paint findings: Rule 1: If painting with a mix of acrylic and enamel, always test first, for an adverse reaction that might destroy your paint scheme! Rule 2: DO NOT overspray any enamel paint with acrylic spray paint! (The solvent in the acrylic spray paint attacks the enamel paint surface.) Brushed acrylic paint is probably OK to use on top of enamel paint (But check on a test piece first). (Brushed enamel paint must use a different solvent to acrylic spray paint.) Enamel spray paint is probably OK to use on top of acrylic paint (But check on a test piece first). Acrylic spray paint is OK to use on top of a previous coat of acrylic spray paint by the same manufacturer. Acrylic spray paint is probably OK to use on top of a previous coat of acrylic brush paint (But check on a test piece first). The paint scheme on the Standby Generator Coach based on the above research has gone O.K.......
The standby generator Car 977995 (complete with grey roof) 2 down & 3 to go !!........ |
|
Track Recording
Coach:
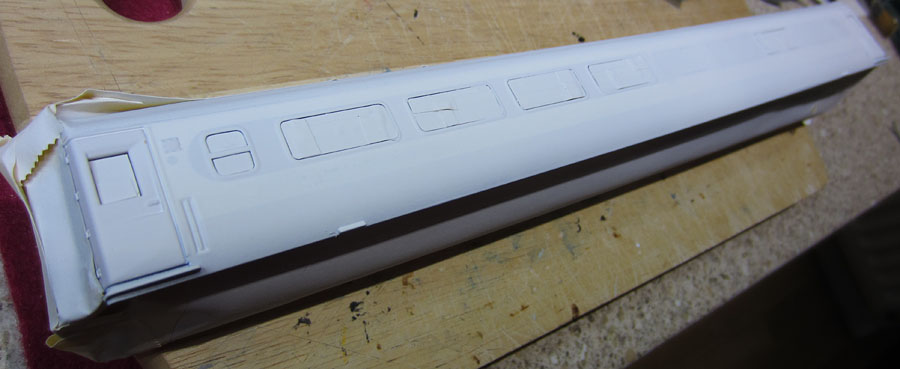
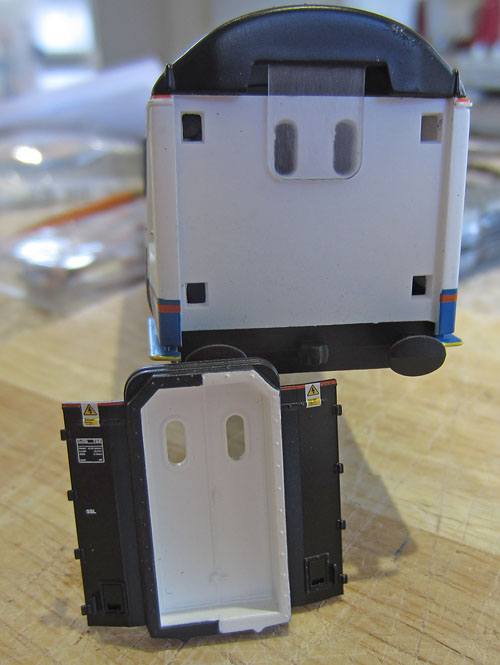
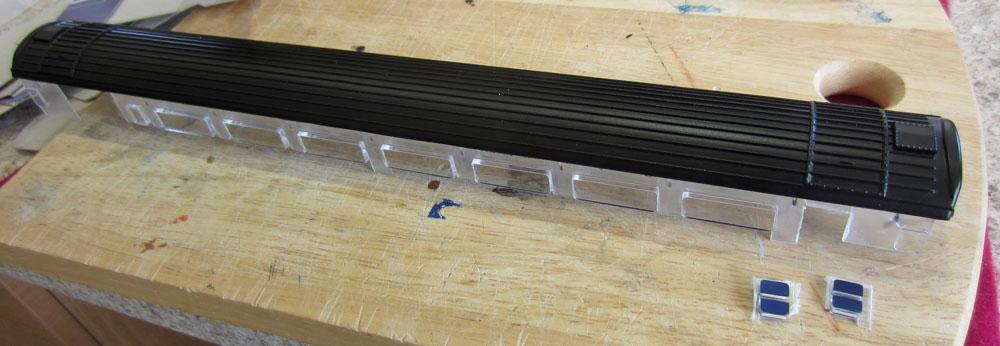
(Based on the Lima build style Hornby TGS Mk3) As a result of some Google searching, I've discovered that there is a better way to extract the windows and roof moulding from the Hornby/Lima TGS coach body: After removing the coach body end plates, Make a vertical cut in the inner end wall, from roof to floor (after removing the overhanging window material tag). The body can then be flexed outwards much more easily, as the windows are flexed inwards. The roof & windows moulding can then be removed more easily, before the body sides are painted..... eliminating the need for window masking! Upon re-assembly, the cut can be re-bonded for strength and is then hidden by the end plates. The dismantling process is as follows: 1) Remove the coach end mouldings (gently lever off using a small flat screwdriver inserted into the gap at the bottom of the corridor connection.)
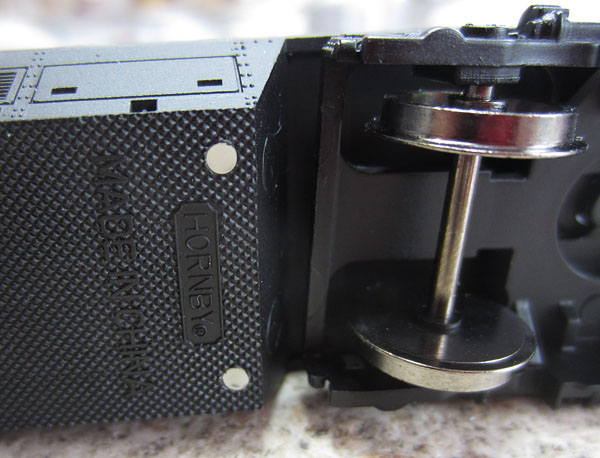
2) Remove the two bogie assemblies from the under frame (these just pull off). 3) Separate the coach underframe from the body. (Insert a suitable size flat screwdriver between the lower edge of the body end and the top surface of the under frame and carefully apply separation force by twisting the screwdriver. When the end clips have separated, move the screwdriver further into the gap between the underframe top and body underside and twist again to release the clips. Repeat at the other end until separation is achieved.)
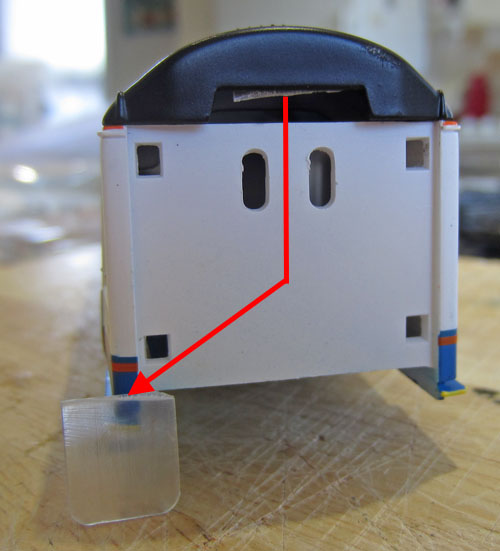
There are no buffers fitted to HST stock, so these were later removed.
4) Break off the window tabs at the top of the body ends.
5) Make a vertical cut down the centre of the body end wall. (Using a sharp Stanley knife or equivalent.)
6) Ease small sheets of thin card between the inner side of the body sides and outer side of the windows. (Flex the body sides apart to make this process easier.) Being careful to minimise the force applied to the roof/window moulding (which is quite brittle) separate the roof/windows from the body.
7) Cut the painted-over toilet windows away from the roof/windows moulding as these will be glued to the body sides and filled flush before painting.
The roof/windows moulding is then carefully wrapped and stored away. It wont be needed again until re-assembly of the repainted coach!
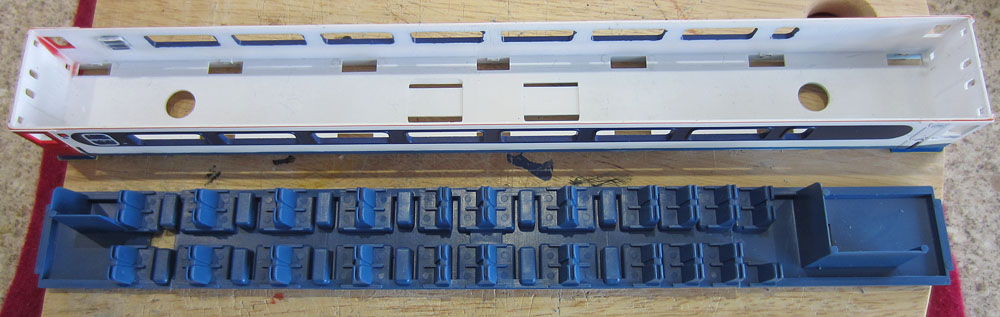
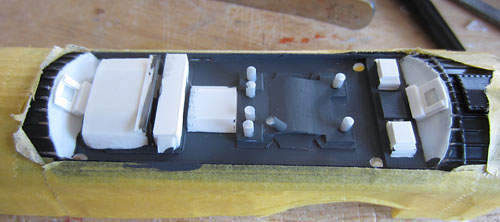
8) Remove the seat moulding for modification to include the operations centre with computer racks and VDU stations.
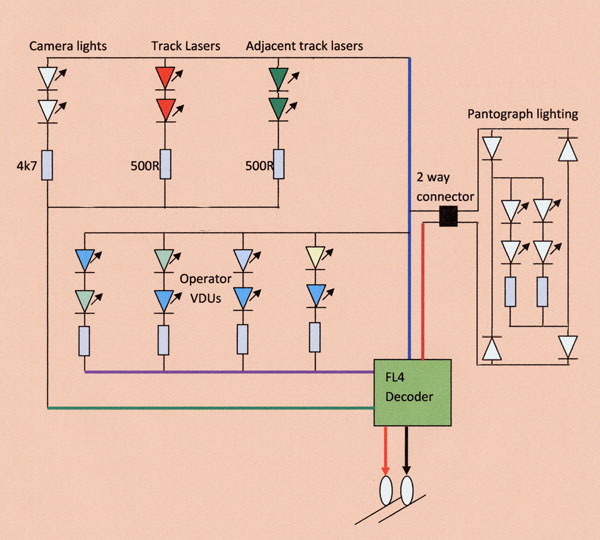
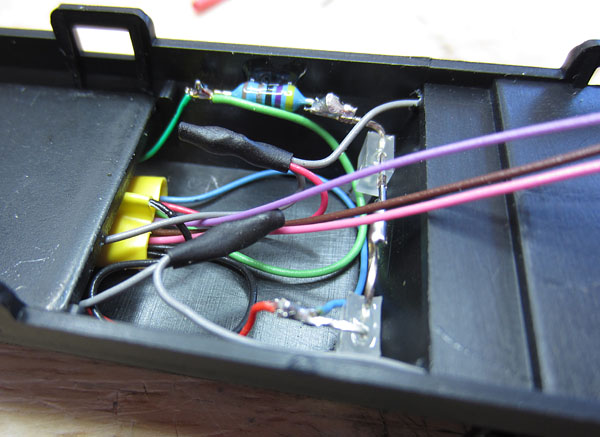
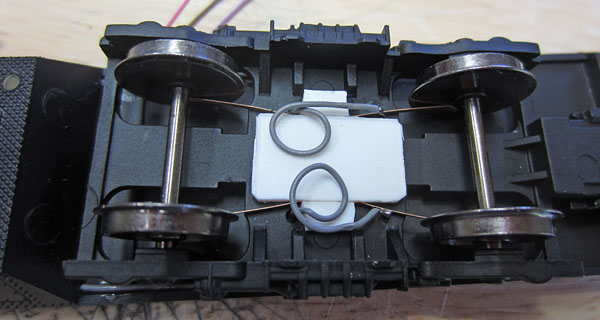
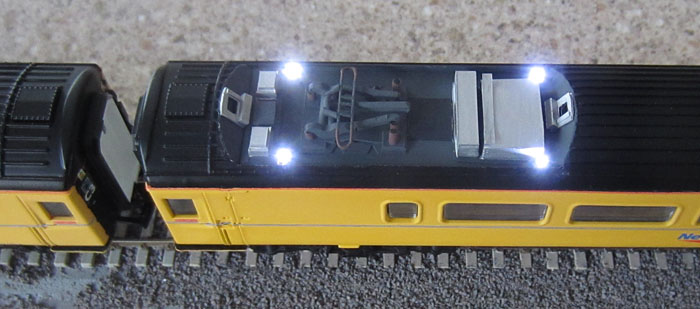
Next a bit of fun: ..... I think the track monitoring laser and camera systems of the real NMT are incorporated into the coach bogie assembly(s), but on my NMT, they will be a bit more visible, with light sources near the ends of the lower centre section. The Track recording coach will be fitted with wheel contacts on both bogies, connecting to an FL4 decoder to enable the lighting effects: White track camera illuminators, red track lasers & green adjacent track laser beams plus 8 illuminated VDU screens inside the coach for the three operators. A two way connector will go to the pantograph car, to activate the 4 white OHL illuminating spots surrounding the pantograph. The power car decoder programming will have to be re-mapped to free up at least 2 coach control buttons within the 0 to 12 range of the FL4 to control the coach lighting.
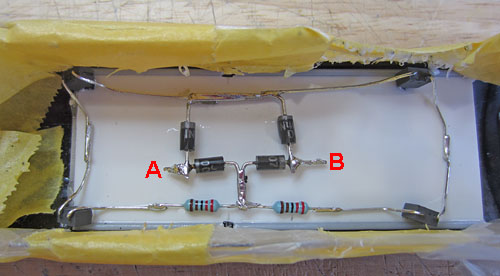
The proposed lighting circuit VDU resistors are all 10k, Pantograph resistors are both 2k7 (The diode bridge means the pantograph car connector can be used either way round) |
|
Track Recording Coach:
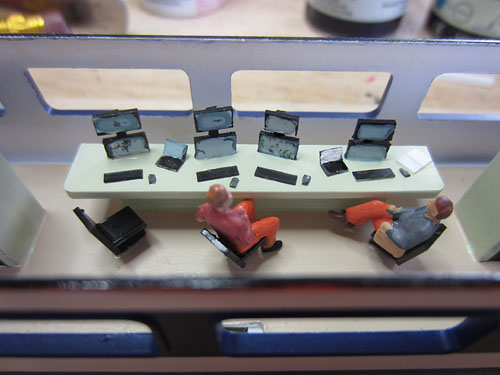
The
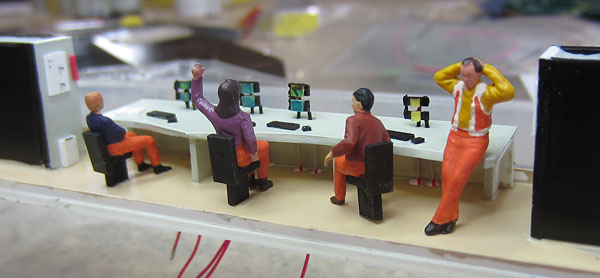
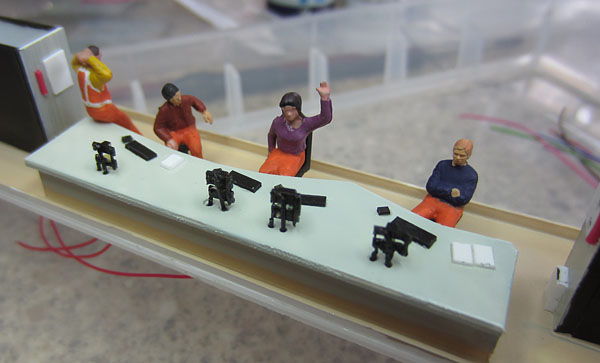
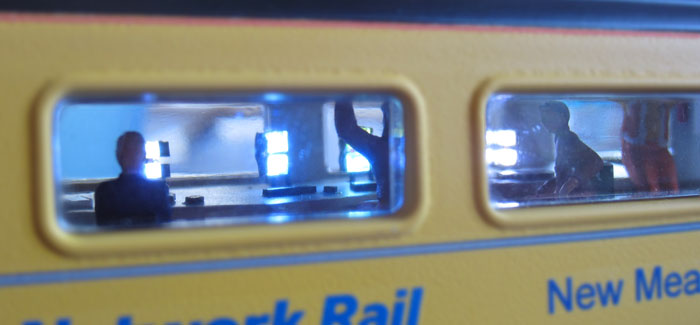
Technicians & some of the electrics..... Using a Network rail video that I found on Youtube, some idea of the coach layout can be obtained. (Click here to see the Network Rail video)..... There is a sideways orientated operators desk with 3 technician stations and 8 computer screens approximately half way along the coach. on either side are racks of computer equipment. My VDUs are too small, but are made from white LEDs with painted fronts, which can be illuminated. The train crew seem to predominantly wear orange safety trousers with orange & silver safety vests either worn or ready to use.
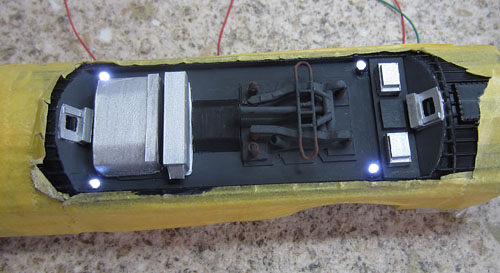
(VDU LEDs are not yet powered)
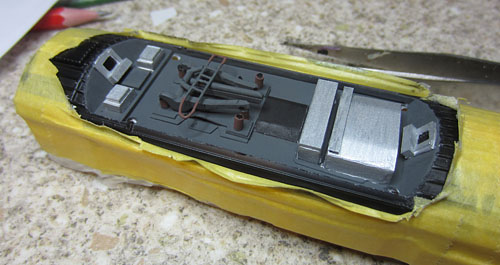
Crew in place in the highly modified seat moulding assembly
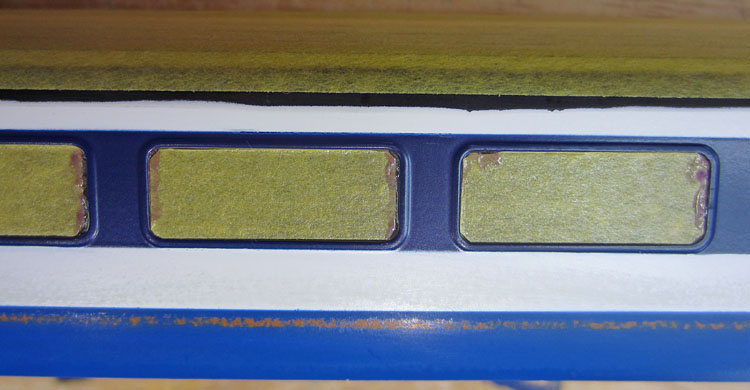
Laser and camera lights are fitted in the under frame moulding: Tower LEDs are mounted in 2mm holes drilled through the plastic:
Red track scanning lasers and green adjacent track scanning lasers are fitted
Showing the coloured tower LEDs inside.
The white illuminating lights for the high speed track video cameras. (The FL4 decoder will fit inside, beside these LEDs)
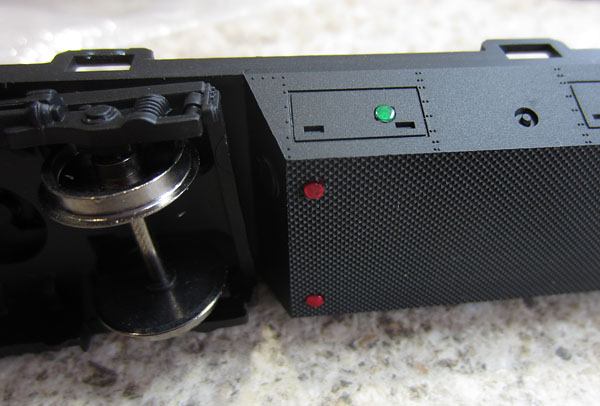
FL4 decoder (in yellow wrapper) wedged under the ballast weight.
Wheel contacts installed on (both) bogies. (Before plasticard is painted black)
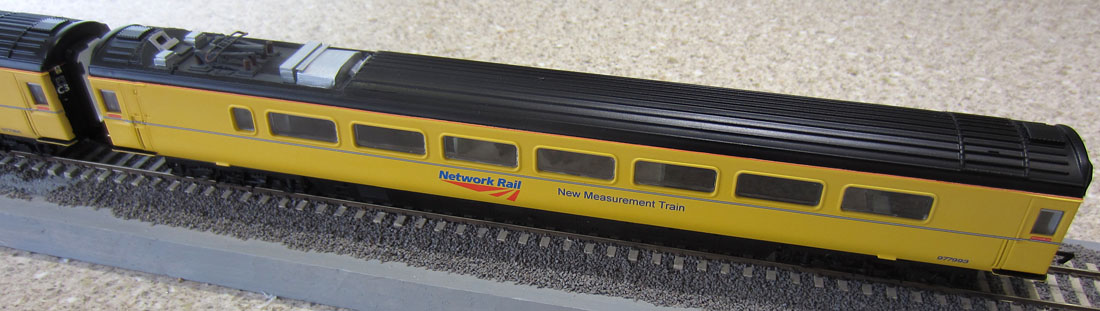
I know the real track recording car is now painted in plain warning yellow...... but I prefer its earlier livery!
No need to mask the windows on this one! .........Just got to apply the matt varnish when the transfers have fully dried out, then I can remove the masking and tidy up any overspray on the inside walls of the coach, before thinking about how best to put it all back together again :-) Just hope the windows still fit, with the extra paint around the frames! |


|
FL4 Programming: The Function decoder in the Track Recording Car is wired as indicated in the circuit diagram: Green wire: Track camera lights and lasers Purple wire: Track recording car VDUs Brown wire: Pantograph car OHL spot lights The initial button assignments are: Button 9: green wire plus purple wire Button 12: brown wire
Back together again & button 9 activated
Network Rail Staff monitoring their VDUs
Miniature 2 wire connector glued to the end of the car adjacent to the pantograph coach.
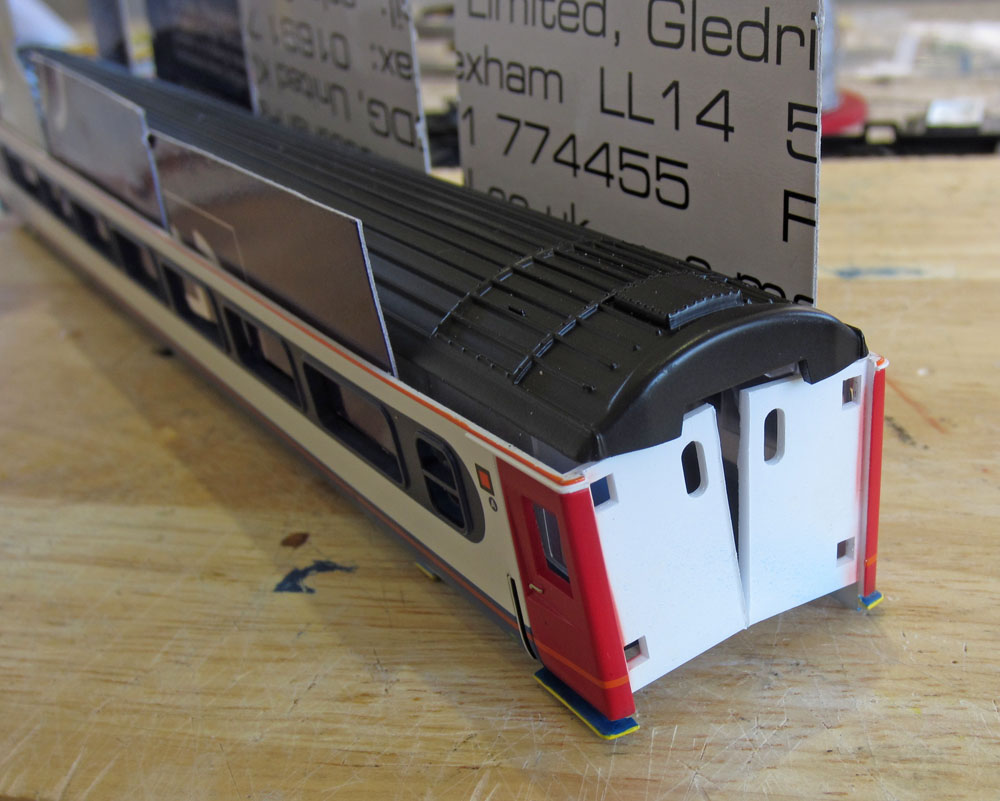
Three down, two to go! |


|
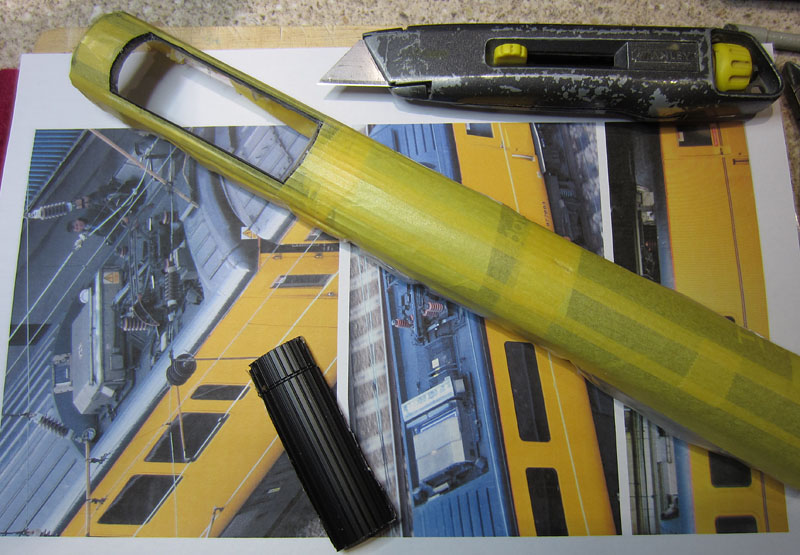
The Pantograph Car:
(Also based on the Lima build style Hornby TGS Mk3) The EMT TGS coach was dismantled in the same way as the track recording coach. The roof & window moulding was then covered using polythene bags and Tamiya masking tape, to protect the roof and windows from damage while the pantograph mounting bay was constructed. A Stanley knife and small drill were used to remove a rectangle of roof somewhat smaller than the final mounting bay size. With great care, the sides were pared down using the knife and a small flat file to the final size.
Internet sourced photos showing the pantograph in some detail were used as a guide.
The mounting bay was constructed from plasticard sheet and when this has been fitted, the same material was used to make a miniature version of the pantograph assembly and the monitoring equipment. Four white tower LEDs were mounted to simulate the spot lights used to illuminate the OHL near the contact point.
The entire replacement seat moulding with two large sets of computer racks on each side of the monitoring stations.
The central coach moulding masked up, ready for painting (note the filled end windows).
Pantograph Car complete.......4 down 1 to go!
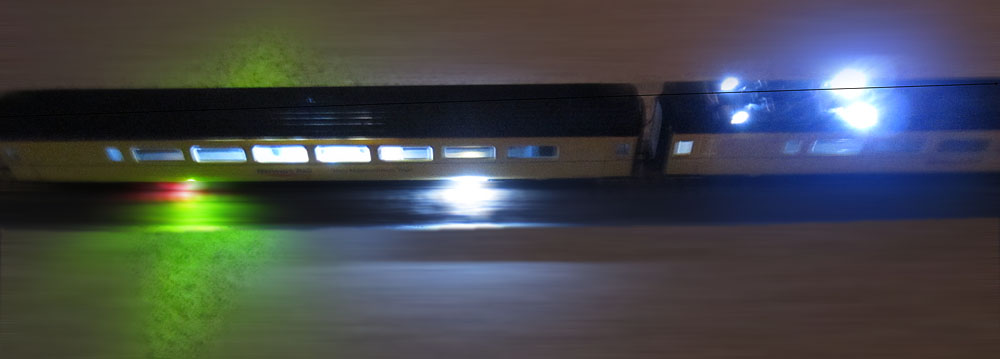
Night Ops |

|
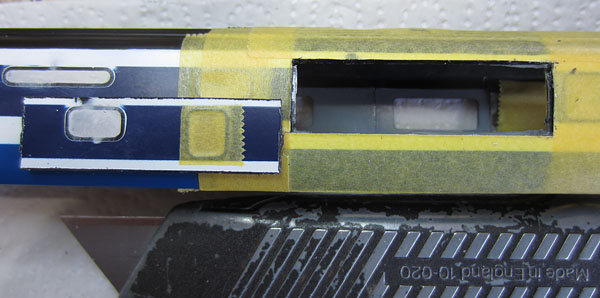
The Staff Car:
This coach requires some changes to the window configuration
of the original buffet car to accurately reproduce the staff coach.
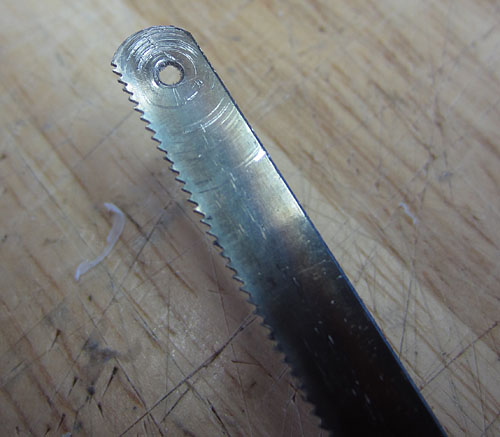
I've just ordered a razor saw on Amazon........ I'll have a go at modifying 2 of the windows on the non-kitchen side of the coach and see how that goes before I decide on the full scope of the modifications. Too impatient to wait, so I made my own razor saw by removing the fixing pin from a fine tooth junior hacksaw blade. The window modification process is shown graphically below: The two reduced height windows adjacent to the three full sized windows on the non-kitchen side of the coach need to be replaced by another full sized window to the left, and a narrow, but full depth window mounted to the right and offset to the right. The two new windows are taken from a donor Cross Country TGS coach..............
Pin removed from hacksaw blade..... (This was used to cut vertical slots in the original window strip inside the coach.)
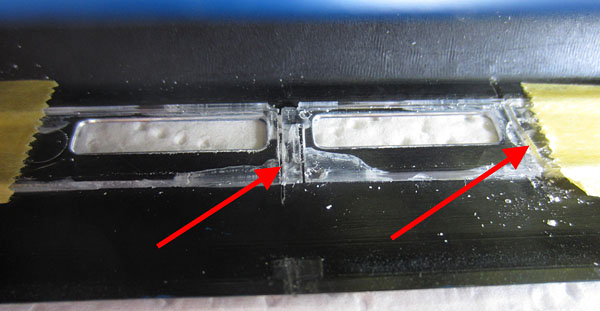
Showing the first two cuts (indicated by the arrows).
Had to use a chisel to separate the sections of window from the body plastic... The Chinese have certainly improved their window gluing process!
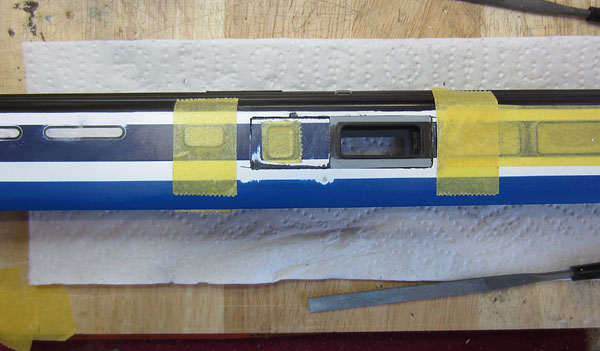
Now working from the outside, the rectangle of plastic to be removed was defined by masking tape strips. The Stanley knife was then used to scribe the lines along the edge of the tape. Repeated scribing eventually took the knife right through the plastic and the original reduced height window frames plus the area below required to accommodate replacement full depth frames.
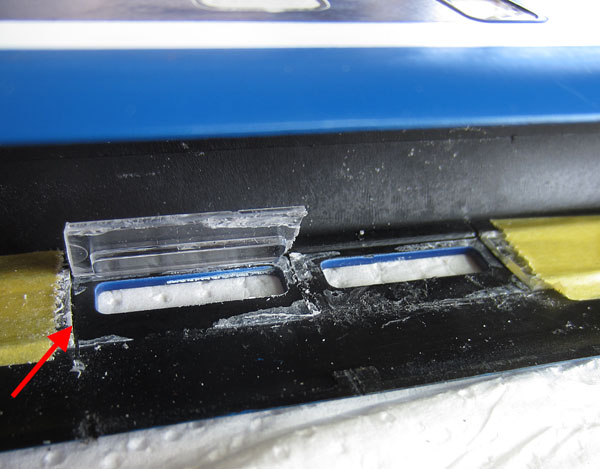
The new full size window frame from the donor Cross Country TGS was very carefully trimmed to fit the left side of the aperture.
The smaller full depth window was then also carefully trimmed to fit in the right of the aperture, offset to the right. The body side profile of the Lima/Hornby TGS is slightly different to that of the Hornby buffet car, so some filler was needed to blend the underside of the new window frames to the buffet car sides. Further detailed filling and smoothing between the window frames may be required after the initial coat of overall white primer is applied. O.K. Now we have a technique, I'll tackle the other side too! First, the equivalent change on the kitchen side........
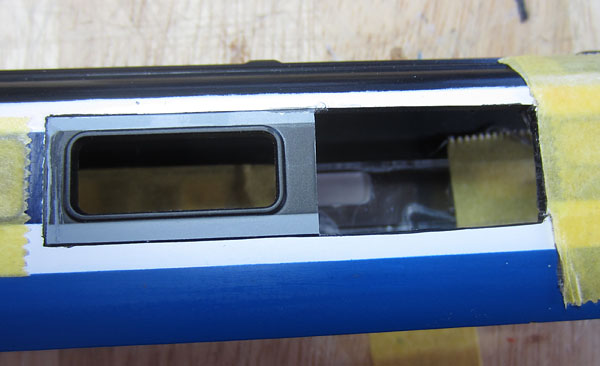
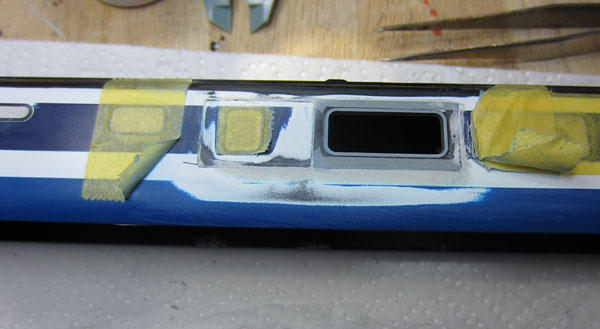
A rectangle of coach side is removed (complete with window this time).
A new full size window is inserted and the small window is then re-fitted further down the coach side.
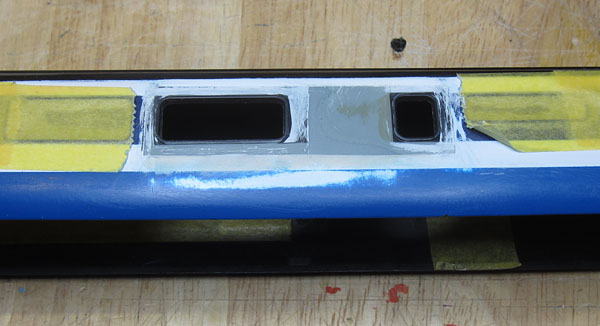
Filler is applied and the new window sections are filed flush.
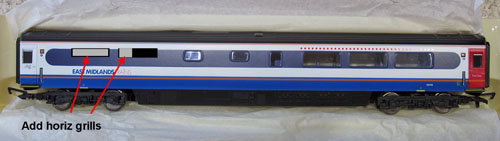
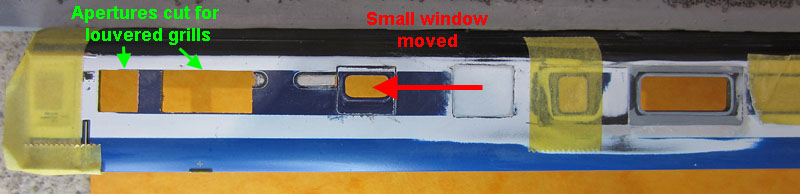
Next, the small window beside the area modified above is re-positioned and apertures are cut for the louvered grills near the end of the coach.
Ready to apply filler to the re-positioned small window surround.
The frames for the louvered grills are mounted over the aperture surrounds. (The grills are represented by a computer printed pattern glued to plug-in plasticard pieces, which will be inserted from the inside when the painting has been done.) The final bodywork mod is the addition of the extra end window on the kitchen side of the coach:
Bodywork mods now complete (except for the new window transparencies which also go on after painting.)...... next comes the masking-up process. (I'm keeping my fingers crossed that the window mods won't look so obvious after painting!!!!!)
The TGS coach windows are not quite the same as those of the original buffet car...... but I think it'll do, nevertheless!
That's the final NMT coach complete! Just a bit of tidying up (e.g. adding C3 labels to the coaches not already fitted.) Then I'll see what can be done for YouTube!
|


Supplier website links:
The photos of the model were taken using a Canon Ixus 220HS on the kitchen worktop, sometimes with on-board flash. |
|
|